

We may receive a commission from our partners if you click on a link to review or purchase a product or service. Click to Learn More
We’ve all been there: you’ve finally set up a meeting in Microsoft Teams at a time everyone has said they can make, and then people have dropped out at the last minute.
Trying to reschedule is a nightmare, but this information is absolutely mandatory, so what are you going to do? To ensure your meeting can go ahead without anyone missing a beat, it’s best to record it so those who missed it can access it later.
In this article, we’ll explain how to record a Microsoft Teams meeting in just four steps, and show you where you can find those recordings once you’ve finished your meeting. We’ll even show you how to change the expiration dates so you can keep them for longer.
- Recording a Teams meeting is easy, and the process is nearly the same whether you’re recording on a computer or mobile device.
- The meetings are saved either in the meeting organizer’s OneDrive or the meeting channel/chat if it was recorded in a specific channel.
- While meetings don’t automatically record to computers, the meeting organizer can easily download them.
- To avoid losing important meeting recordings, change or turn off the expiration date.
How To Record a Teams Meeting in Four Easy Steps
Before looking at the steps, keep in mind that free Microsoft Teams users aren’t able to record meetings. According to Microsoft, you need one of the following licenses to record:
- Business Essentials
- Business Premium
- M365 Business
- Office 365 Enterprise A1, A3, A5, E1, E3, E5, or F3
Once you check you have a relevant license, follow these steps:
- Start or join a Teams meeting, and then navigate to the meeting controls.
- Select More Actions (the button with three dots), go to Record and Transcribe, and click Start Recording. If you’re on a mobile device, you’ll go directly from More Actions to Start Recording.
- To stop the recording once the meeting’s done, repeat Step 2 but click Stop recording instead.
- Once you stop the recording, Microsoft Teams processes it and saves it. The meeting organizer gets an email once the recording is done and ready to view/share.
It’s also worth noting that you cannot record Microsoft Teams meetings with the free plan. You’ll have to ensure that you have paid Microsoft Teams subscription, which starts at $4 per month.
Need to upgrade? Check out our Microsoft Teams Review and Pricing Guide
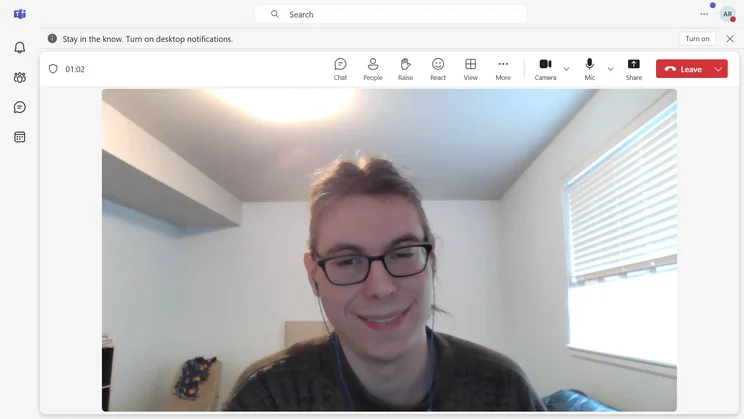
Microsoft Teams users can create and schedule video chat meetings within the platform. Source: Tech.co testing
Managing Your Recorded Microsoft Teams Meetings
Now that you’ve figured out how to record a Microsoft Teams meeting, what are you supposed to do with them? In fact, there are plenty of options when it comes to managing your video-recorded meetings, and we can help you figure out the best option for you.
Here are a few tips to help you find, download, and manage your recorded Teams meetings:
Where To Find Your Recorded Teams Meetings
If your meeting took place in a channel, the recording will be in the meeting chat on the channel.
Non-channel meetings are found exclusively in the meeting organizer’s OneDrive, though they can share the link to others.
There’s no option to automatically record your Teams meetings on your computer, and you’ll have to download the recorded meetings to save them to your device.
How To Download Recorded Teams Meetings
To download your online meetings that took place in a channel, select either the Files or Shared tab in the chat and find the file of the recording. Select it, click More options (the three dots icon), and then Download.
If the file is in your OneDrive, navigate to the proper folder, right-click on the file, and select Download.
Change the Expiration Date of a Recorded Meeting
Teams meeting recordings have an expiration, and it’s important to adjust this if you want to keep the recordings for a long time.
To change the expiration date, go to your Teams calendar and click on the meeting to open up its details. In the Recap tab, open the recording, and click on the countdown under the video. Then, choose a new timeframe from the menu or click No expiration if you want to keep the recordings forever.
Whether you want to refer back to a meeting in the future or share it with team members who couldn’t participate live, recording Microsoft Teams meetings can dramatically improve your team collaboration. The process is quick and easy, as is finding and downloading the recordings.
For more information about Microsoft Teams, explore our guide on virtual avatars (if you need a break from being on camera) or the details of Microsoft Teams’ facial recognition feature.
FAQs
If you have a license that lets you record meetings and still can’t, you might have recording disabled. To check, go to your profile, then Settings, and select Permissions. From there, make sure the Allow recording option is on.
To ensure your recordings are high-quality, you should use an external camera and microphone, have lights in front of you rather than behind you, use a fast internet connection, and record in a quiet space.
Microsoft Teams does not allow for video recording on the free plan. You’ll have to pay for an actual Microsoft Teams subscription, starting at $4 per month, to get access to these features.


